Showing posts with label snack. Show all posts

Sunday, September 7, 2014

Baked Karela Chips (Pavakkai, Bitter Gourd/Lemon) A change from Kale chips


Want a change from Kale but with all the goodness associated with it? try bitter gourd chips - they are recommended in the diet of diabetes but if you want to know more about this delicious veggie here is an excerpt. 

Nutritional Benefits
Bitter gourds are very low in calories but dense with precious nutrients. It is an excellent source of vitamins B1, B2, and B3, C, magnesium, folate, zinc, phosphorus, manganese, and has high dietary fiber. It is rich in iron, contains twice the beta-carotene of broccoli, twice the calcium of spinach, and twice the potassium of a banana.
Bitter melon contains a unique phyto-constituent that has been confirmed to have a hypoglycemic effect called charantin. There is also another insulin-like compound known as polypeptide P which have been suggested as insulin replacement in some diabetic patients. (thank you Juicing for health.com)
While I make several different kinds of recipes with this, including a kootu or a veggie gravy, or sautéed curry with onions and tomatoes or even stuffed with interesting goodies, baking them into chips seems by far most healthy and least effort and longest lasting :)

The Recipe

Set Oven at 400 degree F
Pre wash Karela and pat them dry
Cut the tips first and then pick a tip to start cutting into discs
As you cut, keep scooping out the seeds
Spray baking tray with olive oil and arrange discs each separately
Spray over them once again
Bake for about 18-20 minutes until golden brown in the bottom rung 
If still a bit soft, broil on low heat for about 5 minutes moving it to the top rack – Keep watching so they don’t burn.
Remove from oven and cool until they are crisp

Add desired spices to it and shake it up 
Store in an airtight box

NOTE: If you are storing, just broil for a couple of minutes to bring back the crisp

Spicing:
I use either a bit of rasam powder or Sambar powder with a little salt and i put them in a box and shake it until the spices are mixed in

Note: If you find them a bit bitter, you can squeeze a bit of fresh lemon or lime juice, just before you eat 


Don't forget to check out PRIYAS NOW CATERING 

Monday, March 17, 2014

Spaghetti Squash Coconut Sevai


First of, thanks to all my Facebook friends who drooled and went gaga over this dish - that is my best motivation to keep trying new recipes and blogging them

I have worked with Spaghetti squash in the past, but once to bake it and one other time to make a halwa, all well before I started writing this blog. However, this unbelievable gem of a veggie went off my radar for a long time. This was one of the easiest recipe decisions to make in so far as keeping the preparation simple yet tasteful.
The trick is to allow the squash to shine and be the hero of the dish and not overpower it with too many spices. Add a tsp of coconut oil and  fresh grated coconut enhanced the taste of the squash and made for a delectable meal. Without further ado here goes
My sweet husband putting in the muscle to unstring the squash

And voila

Ingredients


  • 1 medium sized squash cut down the middle vertically and spaghetti unstrung from the sides and into a bowl
  • 1/2 cup of fresh frozen grated coconut thawed
  • 2 Tbsp roasted cashews
  • 2-3 finely chopped green chilies (ours were homegrown)
  • 1/tsp of mustard seeds
  • 1/2 tsp of turmeric
  • 1tsp of urad dal
  • 2 tsp of olive oil
  • 1tsp of coconut oil
  • pinch of asafetida
  • 1/3 cup of water
  • Salt to taste
  • 2 tsp juice of freshly squeezed lemon
  • Cilantro for garnish


Method

  1. Splutter mustards, urad and hing in the said amount of olive oil
  2. Add the chilies and allow them to cook for 30 secs 
  3. Add the squash noodles
  4. Add the the water and keep closed for about 3 minutes and allow it to cook until al-dente
  5. Open and allow the water to evaporate. 
  6. Add salt and coconut  and cashews and turn them in to the squash
  7. Once cooked, transfer to a serving dish squeeze the lemon and.garnish with cilantro and serve hot


Monday, March 10, 2014

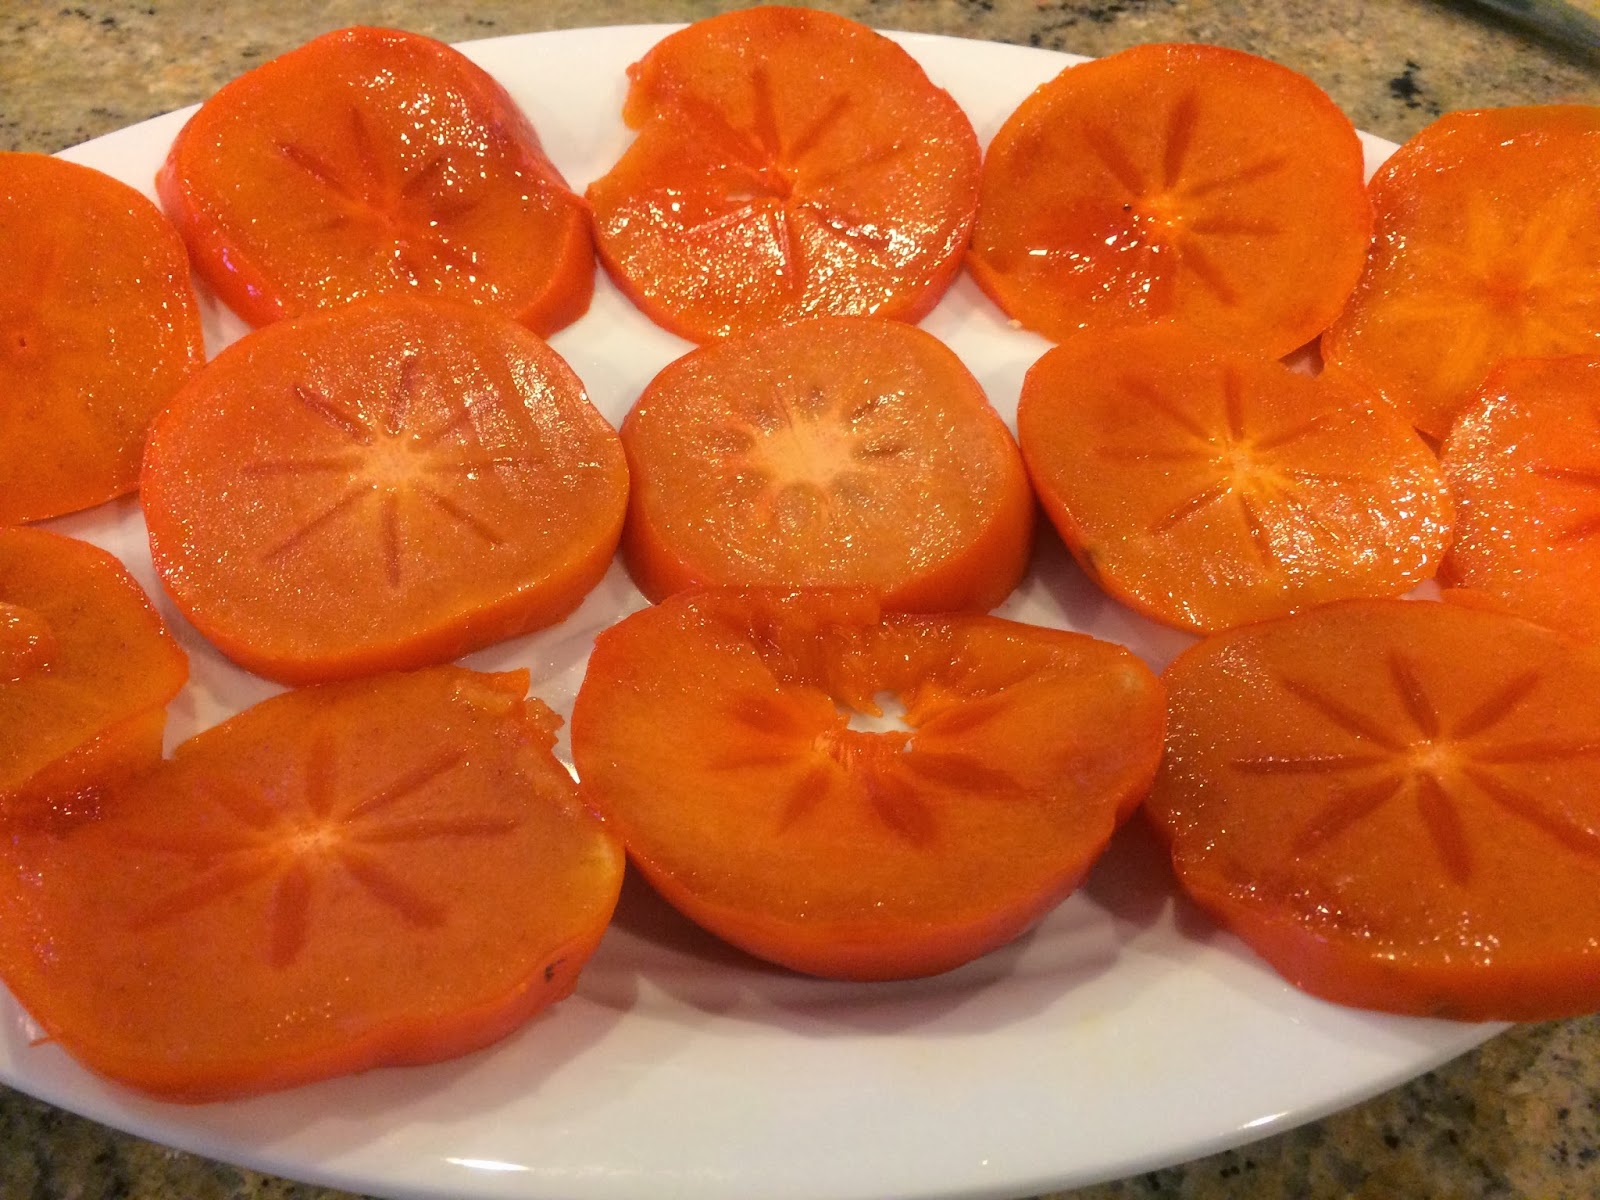
Pan Roasted Persimmon With Fresh Mozzarella

Looking for a simple yet delicious hors d'oeuvre? Here is an idea -


What you need
2 persimmons washed and sliced into 1/2 inch discs to display the beautiful starry middle :)
About 10 slices of Fresh Mozzarella
1 tablespoon of olive oil
Juice of 1 orange
1 tsp soy sauce
pepper & a pinch of salt

Method
Roast the persimmon in the oil
Add half the orange juice, the soy sauce
Allow to cook for a minute before removing from heat
Pepper and salt
Transfer to a serving plate
Add the sliced mozzarella to the pan and cook for just a minute
Drizzle the rest of the juice over it
Pepper and salt to taste
Serve chilled


TIP: Add a sprig of basil for added flavor and or as a decoration.
I placed the mozzarella over the persimmon to serve --Sadly I did not take a picture of it before it was served to guests!


Wednesday, January 29, 2014

Baked Zucchini Noodles with Pistachios and Sun Dried Tomatoes


Ever since I learned how, I have been making these and absolutely LOVE it  and make it at least once in 2 weeks - It is healthy, guilt free and what's more so tasty - dress it up with your favorite nut, some of your favorite cheese and if you want sauce and you've got yourself a wholesome no carb meal


For making these you need the sharp julienne peeler which will strip you zucchini into thin noodles - be mindful, these instruments are viciously sharp so please use caution while using it

How many zucchini's you use depends on how many people you are making for - I used 3-4 for  4 of us - While stripping, stop when you come to the seedy part of the vegetable. By then it will start breaking anyhow.

Instructions
Strip, arrange in a baking dish; crumble cheese, sun dried tomatoes and toss in some walnuts, some pepper - Do not salt now or it will become watery … salt before eating.

I broiled for 15 -18 minutes or until the cheese has melted - BTW, I used some goat cheese. SO GOOD!

Enjoy and repeat :)


Tuesday, January 15, 2013

Khobz - A Delicious Moroccan Bread

Khobz 


Happy Kanu Pongal to all - feeling quite under the weather - I had contracted Lyme Disease a few years ago and the recurring effects of it are joint pains - My knees are begging for mercy from a sharp shooting pain that has ruled my life for almost 24 hours now! I am quite sick of taking Advil and have resorted to arnica - hoping to get an acupuncture appointment for it Sigh! feeling better after off loading some of my woes!

I had made this bread several weeks ago but it is good I held back posting it for this week with the Avant Garde Cookies, we are making breads - And this is a wonderful addition to any dinner table. Not much different from any other bread in so far as the recipe goes, what sets this apart is the incredible crustiness of the outside shell and the incredible softness of its inside.

How it came about
We had gone to a local Moroccan restaurant, one that has apparently been around for over 3 years and this was the first time we'd paid attention. The food was not great, but good. However, what had me raving was the Khobz - it was out of sight yummy. I did talk to the chef and owner about it and he did not really reveal the recipe, but said it needed a lot of kneading.

More internet searches reveal recipes that were not any different from any other kind of bread. So I took the chef's word for it and kneaded it for an extra long time in my mixer. The other trick was to use lesser water and keep the dough somewhat tough. I did use 1 tbsp of olive oil. While mine was really tasty and well-received, I know I "knead" a lot more to get the same great bread from the restaurant - practice maketh perfect -
One last hint from the chef - rewarming the bread also gives it the crispiness on the shell and the softness inside... so go ahead and give it a try -If nothing else, if you are in Morocco sometime, you'll at least know to order khobz :)  Presenting Khobz

Khobz as explained by about.com

Moroccan and Standard Arabic: الخبز
Khobz is the Moroccan and standard Arabic word for bread. TheTamazight (Berber) word kesra and Tashelhit (Shilha) word agroummight also be used, as might the French word pain.
Although khboz and kesra may mean different things to different Moroccans, both terms are used in a general sense to refer to oven-baked bread which is shaped into round, flattish loaves with lots of crust. During a traditional Moroccan meal, khobz often replaces utensils such as forks or spoons as it is used to scoop up meat, vegetables, sauce, salads, dips and more.
Different types of flour can be used to make khboz. Exactly what goes into each loaf, and how large or small it is shaped, is a matter of personal preference. White, semolina, wheat, rye, bran and barley are some of the flours that might be used, while anise and cumin seeds are just two additions that could be added for extra flavor.
In rural areas, many families use small dome-shaped wood burning ovens to bake their bread. In urban areas, families might opt to bake their bread do so in public street ovens. Both methods give bread a unique flavor and character that simply can't be matched in a conventional oven or by Moroccan bakeries. Nonetheless, very good Moroccan bread can be baked in home ovens, and it's worth trying to make your own bread to complement a Moroccan meal.
Recipe is replicated from About.Com - thank you!


I added some thyme and moroccan spices for flavor


Allow 1 hour rising time. Yields two 8" to 9" round loaves.

Prep Time: 20 minutes

Cook Time: 25 minutes

Rising time: 1 hour

Total Time: 1 hour, 45 minutes

Ingredients:

  • 4 cups white flour
  • 2 teaspoons salt
  • 2 teaspoons sugar
  • 1 tablespoon yeast
  • 2 tablespoons vegetable oil
  • 1 1/4 cup warm water
  • additional flour for kneading
  • cornmeal, semolina or oil for the pan

Preparation:

Prepare two baking sheets by oiling the centers, or by dusting the pans with a little cornmeal or semolina.
Mix the flour, sugar, and salt in a bowl. Make a large well in the center of the flour mixture, and add the yeast.
Add the oil and the water to the well, mixing to dissolve the yeast first, and then stirring the entire contents of the bowl to incorporate the water into the flour.
Turn the dough out onto a floured surface, and begin kneading the dough. If necessary, add flour or water in very small amounts to make the dough soft and pliable, but not sticky. Continue kneading for 10 minutes, or until the dough is very smooth and elastic.
Divide the dough in half, and shape each portion into a smooth circular mound. Place onto the prepared pans, and cover with a towel. Allow to rest for 10 minutes.
After the dough has rested, use the palm of your hand to flatten the dough into circles about 1/4" thick. Cover with a towel, and leave to rise about one hour, or until the dough springs back when pressed lightly with a finger.
Preheat an oven to 435°F (225°C).
Score the top of the bread with a very sharp knife, or poke the dough with a fork in several places. Bake the bread for about 20 minutes – rotate the pans about halfway through the baking time – or until the loaves are nicely colored and sound hollow when tapped. Transfer the bread to a rack or towel-lined basket to cool.


Friday, May 11, 2012

Peppa Paneer Frankie Wrap


This dish I am dedicating to my nephew in Chennai - In my week at Chennai not too long ago, there were at least 2 or 3 nights when this young man wanted these Frankie Wraps from a kiosk - apparently a hot joint for these ever so popular short eat. I think these also go by the name of kaati rolls. I have never dared to try one from that vendor - needed a well-adjusted tummy for that, but I tried my own version, a lot healthier one, of course. You can literally make this in under 10 minutes, providing of course you have the ingredients handy - but the beauty is you can make these with just about anything you have around the house - but the one think you do need is a rumali roti or a big tortilla wrap. I particularly like red, yellow and orange peppers for this recipe since they lend a fantastic fresh flavor to the wrap -
Since the wrap itself is caloric, I avoid using any more fat than I have to so I use my olive oil spray.

Ingredients - for up to 4 wraps
1/2 each of Red, Yellow and Orange peppers
1 medium sized onionPaneer but long about 1 cup
1-2 green chilies slit fine and thin
1tsp of sesame seeds
1tbsp humus - this can be subbed by mayonnaise or any other spread of your choice - but bear in mind, hummus is your healthiest and in my opinion tastiest bet
1tsp olive oil (optional as an alternative to olive oil spray)
1tsp sambar powder
2tbsp Szechuan stir fry sauce - spicy
4 large tortillas (250 cals each) Lighter version most welcome

Preparation
Cut all the veggies and the paneer lengthwise
lightly spray them with olive oil spray and sprinkle the sambar podi (powder) over them
In a non stick pan, roast them on high heat
Add the stir-fry sauce over it and allow it to simmer for a minute or two.

I just toasted the tortilla over the flame like a phukla
Add the stuffing and roll - put it on a wide pan tawa and allow it to gets those delectable toasted spots.
Stick a toothpick to keep it from unravelling.
Serve by itself or with a hot ketchup


And that's a wrap for the weekend folks adios until the next post and HAPPPPPPY MOTHERS DAY TO ALL YOU GORGEOUS MOMS OUT TEHRE _ LOVE YOU!

Monday, November 8, 2010

Ribbon Poondu karachev

Poondu Karachev for Deepavali is a family tradition which I never want to give up, considering how well-loved it is - Never fails to hit the home run :-) I just used a different disc, for a change.

Here is my recipe from taste buds/brain recollection of my mom's incredible karachev

Ingredients
2:1 proportion of gram flour and rice flour (Kadalamavu/Besan: Rice flour)
1 whole pod of garlic
10-12 dried red chillies (this is adjustable according to your taste)
1 tablespoon of  warm ghee
Approx 1 to 1-1/2 cups of water
Murruku press with 2 slit disc to get the ribbon shape
Oil to fry

Preparation

Sift the flours so that they are fine and knot free
Add the salt to the dry flours and mix well
Add the wamed ghee and knead in
Grind into fine flowing paste the garlic and red chillies with 1 cup of water
Slowly add the garlic paste and mix in simultaneously into the mix until you get s smooth batter - (see picture below for texture and consistency)

Prepare the press
Grease the press on the inside container of the press and and the outside of the presser that you push down. Take a rounded lump of the batter and drop it into the press, put the presser on top and keep ready

Set up for frying
Fill 2/3 of a deep pan with sunflower or corn oil
Allow it to heat up in medium high heat
Drop a small piece of the batter in to test if the oil is ready - the piece should pop up with a bubbling sizzle around it
Now press the batter moving your wrist around the oil to make circular nest like pattern
Turn it over gingerly
Wait for it to turn light golden brown
Remove from heat and place in a paper-toweled colander to let the water drain

Break them up as they get cooler and store in a seal tight container


Wednesday, November 3, 2010

Pepper Karachev (Milagu Karachev) Deepavali Special

Celebrating Deepavali so far from home is no fun. But we got to make the best of the situation and I want to give my kiddos a small fraction of the fun and enjoyment of this most celebrated festival. So I say to myself, quite whining about stuff and get your act together. My mind went over the sweet and savory treats my mom used to make and I launched on the first of the 3 treats I've plan for this Deepavali and that be - pepper Karachev. I tried to get the flavor of the karachev the even my 2 yr-old so adores from Grand Sweets and Snacks -
Making it by myself somehow feels more satisfying than just buying from the store - there's my silver lining :-)

Very simple recipe

Ingredients:

2 cups of gram flour or kadalmavu
1 cup of rice flour
15-20 kernels of pepper
2 red chillies
5 table spoons of melted butter
oil to fry
1 cup of water

NOTE: you will need a Karachev Press
Preparation

Sift both the flours in a sieve.
Coarsely grind the pepper and add to the dry flour and mix in
Finely grind the red chillies and do the same
Add the desired amount of salt
Melt the butter and slowly to the flour, kneading it in as you go
Add one cup of warm water, slowly kneading as you did with the butter - the consistency is creamy smooth - be careful not make it too watery.

Frying:

Fill a frying pan 2/3 with oil.
Wait for it to get good and hot
Butter both parts of the press and drop a handful of the batter in it and squeeze in oil, rotating arms in making spaghetti nest like formation - picture will explain this better!
Wait until it turns golden brown remove and place in a paper-towel lined container.
break it up after it cools down


Saturday, September 25, 2010

Priya's Pakodas - pakoras, if you will!

These are my quick fix pakodas -what in tamil will translate to 'dhedeer' pakodas  -
First Caveat - Not part of a healthy diet plan, but a devilishly good indulgence every once in a while - After all, it is the weekend - so indulge :-)

Prep time - 10 time, actual making time -20 minutes

Ingredients:

1 cup of  Besan ( or chickpea flour)
1 cup of rice flour
1 big red onion finely chopped
1/2 finger length pice of ginger finely chopped
4 finely chopped green chillies
1 pinch of asafoetida
3-4 pinched curry leaves
salt 1-1/2 teaspoons  ( taste batter before adding more)
1 tablespoon of butter
2 cups of oil to fry them in

Preparation

I hate to mix the onions raw into the batter - so I fry it lightly in 1 table spoon of olive oil and then add them to the flours. knead the onions into the flour after adding the other ingredients - melt the table spoon of butter and add to the mix and knead some more - my trick is to add very little water - The end result should be that the batter should be loose, and somewhat dry and textured not soggy.

Heat oil; start adding the batter in loose balls into the oil; fry until golden; finished product should look crunchy, edgy and mouth-watering. Again, I will post pictures of these when i make them next.

Secret tip:  None :-( sorry!